
This entire project has been an effort to make for a more open floorplan for our growing family, but also for our family to continue to effectively share our table and home with others. All of it is FOR Him, and TO Him, and FOR His glory. The satisfaction of remodeling doesn't last but for a little while...unless the lasting joy of it's beauty and functionality is shared and used for something greater than personal enjoyment. Praise God for the opportunity and ability to do this reno. We are so grateful.
What a difference a week makes! You saw how the house looked prior to the 40th birthday celebration last week...and thankfully, though we were unable to complete the kitchen in time for the party, we did get the house in presentable condition (with several late nights and the help of a handful of amazing friends and family.)
The front room (which used to be the library/office)...
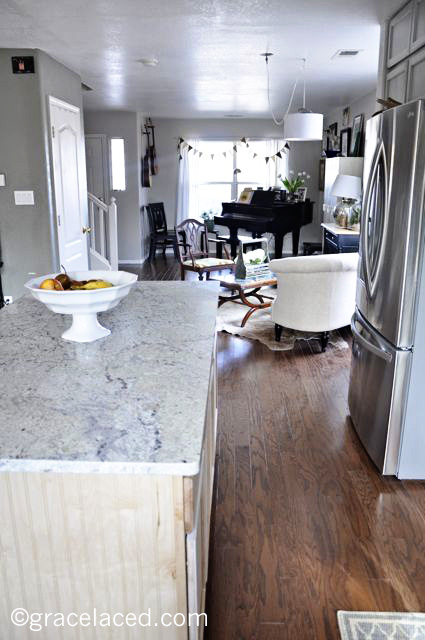
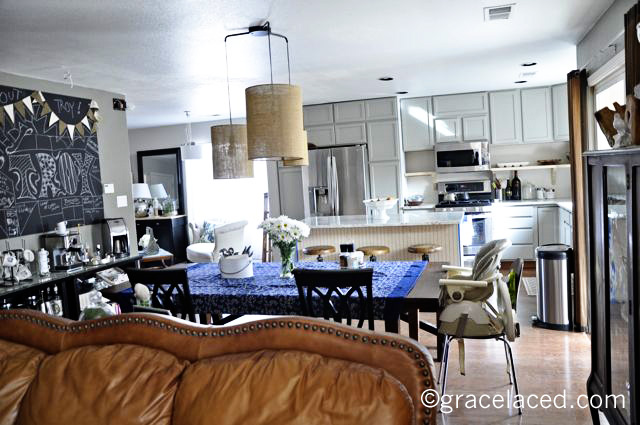
View from the kitchen, where once was a wall that blocked the view of the front entry:
All the elements in this room were existing, minus the cowhide rug, which I found on ebay and paid $100 for after finding some paypal credit I'd forgotten about!
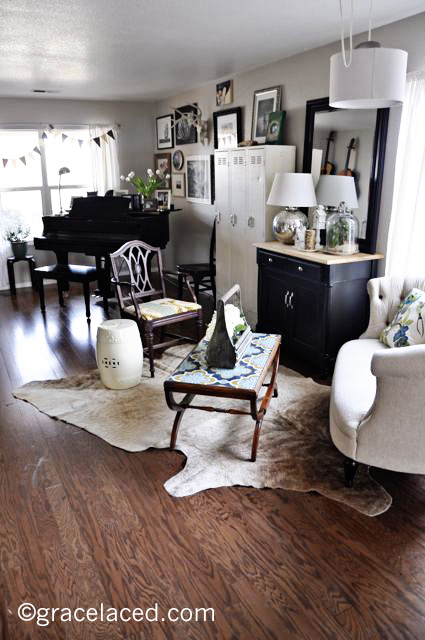
The lockers had been in the entry...I purchased them from an army surplus store. They were a hideous brown until Troy lovingly sanded and painted them for me last Spring. The black (former) kitchen island stores all my tablecloths, and was moved into the front room as a piece of furnishing.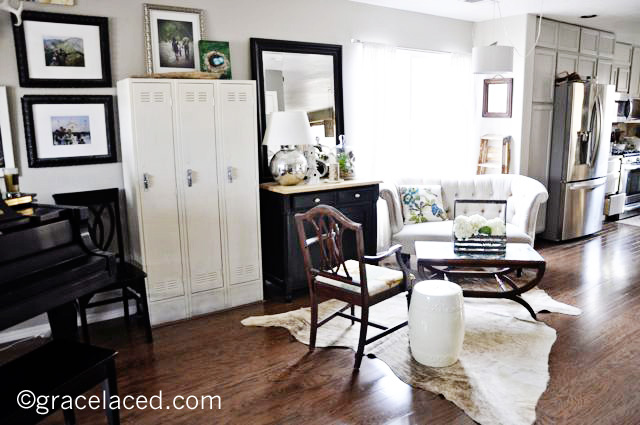
How it looked before (with carpet)...
How it looks now...
Bunting detail on the window was a last minute request I made of my crafty friend for the party. The same friend also arranged this wall using pieces I had in this room previously...old stuff, new view. Do you remember when we found the deer skull last year?

The view of the kitchen from the front entry. Remember when there was a wall there? We're still undecided about whether to put a pot rack up or not. There is still tile, grout, trim, sealing of cabinets, and hardware to be done, but you get the idea...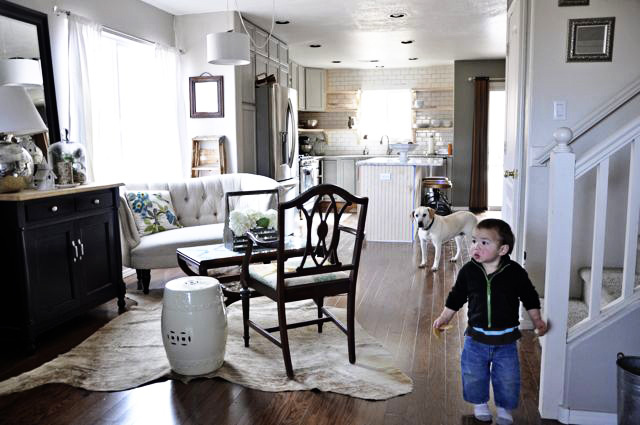
We chose to save money by sanding and repainting existing cabinets, purchasing only enough new ones to make the island and pantry. (Because I know you'll ask...the cabinets were painted "Bedford Gray" by Martha Stewart, matched in Behr Primer and Paint in satin.) We purchased unfinished stock cabinets from Home Depot. The island was constructed from three cabinets, and backed with beadboard paneling in birch. We considered white pickling the island, but really like the natural wood better instead.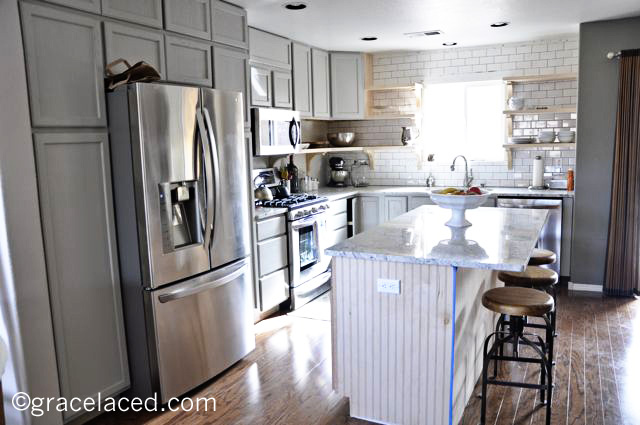 We invested in new appliances and granite countertops, both of which we got at incredible prices over the Black Friday and the holiday season. Wood floors were the other investment, though we found closeout engineered oak for $1.83/sq. ft., plus glue. It was so worth it.
The existing cabinets were raised up to the ceiling, and an open shelf was constructed beneath. We decided to take the two cabinets on either side of the window out completely, and opted for open shelves. I'm loving the open feel... 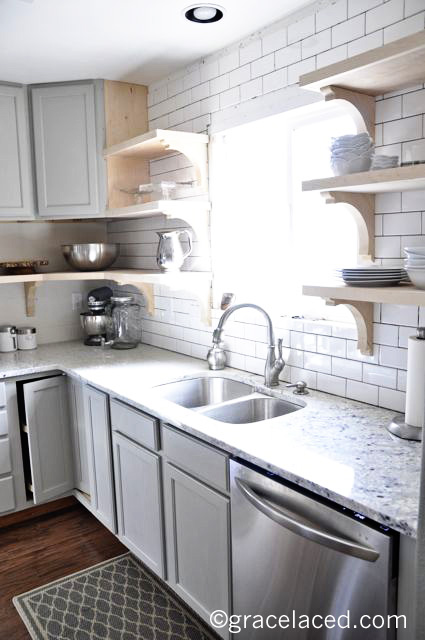
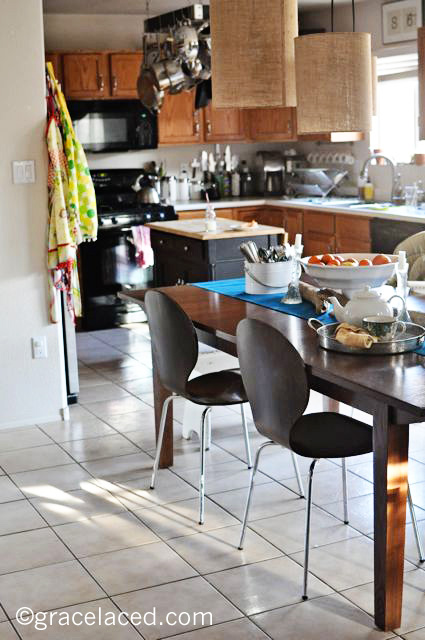
This is how our kitchen was before, closed in and small...
And the way it is now--nice and open!
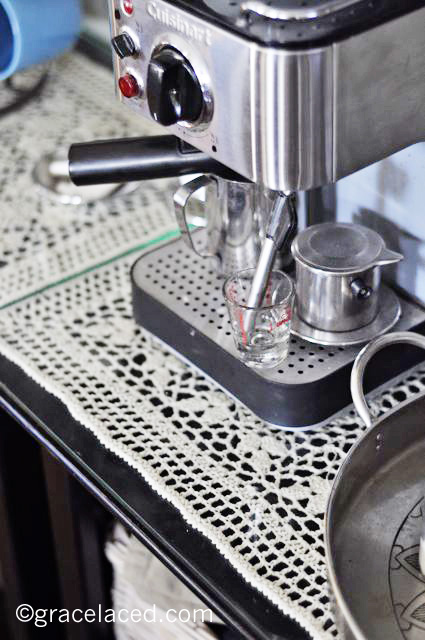
The bookshelves moved to the wall where the panty used to be. They now serve as a coffee and tea bar for the family and our guests. I purchased some inexpensive crocheted placemats from World Market, and placed them along the top of the two shelves, and ordered tempered glass fitted for the two tops.
Thanks for all the support, encouragement, and loving feedback here, and on my FB page. I have the sweetest readers. :) Thanks for letting me share my home, and online home, with you!