Ever grabbed a beautiful new piece of art and wondered about the best way to display it? Or where in your house to hang it? You’re not alone! We get questions about frames, and picking the right spot from you all the time… so we put together a framing guide! Here are six of our best tips for displaying GraceLaced art, and links to a handful of our favorite frames, too.
1. Choose a frame.
Pick a frame that complements your overall decor style. Whether it’s sleek and modern, neutral, traditional, or boho and artsy, the frame itself adds quite a bit of style to the overall look and feel of the art. If there are certain metallic or wood tones in your home, take that into consideration when choosing your frame.

Here are some frames we love!
- White Frame
- Rounded Corner Wood Frame
- Polished Brass Frame
- Sullivan Frame
- Thin Wooden Gallery Frame
- Brass Floating Frame
- Large Square Wood Frame
- AERIN Wave Frame
- Twisted Gold Frame
2. Consider adding a mat.
Mats are typically made from thick paper or cardstock that are laid on top of the art. They help frame the piece and separate it from the glass. In general, they add a bit of breathing room for the art and can also make the final product (art, mat, and frame) much larger than the art alone, adding drama and visual interest. Choose the mat color based on what will look best with the art and your space. Ivory, stark white, or a color from the piece of art are all great options.
Note: If you’re going to use a mat, make sure to choose a frame that will fit the mat, not just the art. For example, you may have an 8x10 print, but choose to add a mat that makes the overall piece 11x14, so you’d want to select an 11x14 frame.
3. Find the perfect place.
When you’re hanging a frame on the wall, keep in mind that the center of the famed art should be at eye level to allow for easily viewing and interaction with the piece. If you’re hanging a single piece of art above a piece of furniture, we recommend lining up the bottom of the frame 8-10 inches above the furniture.
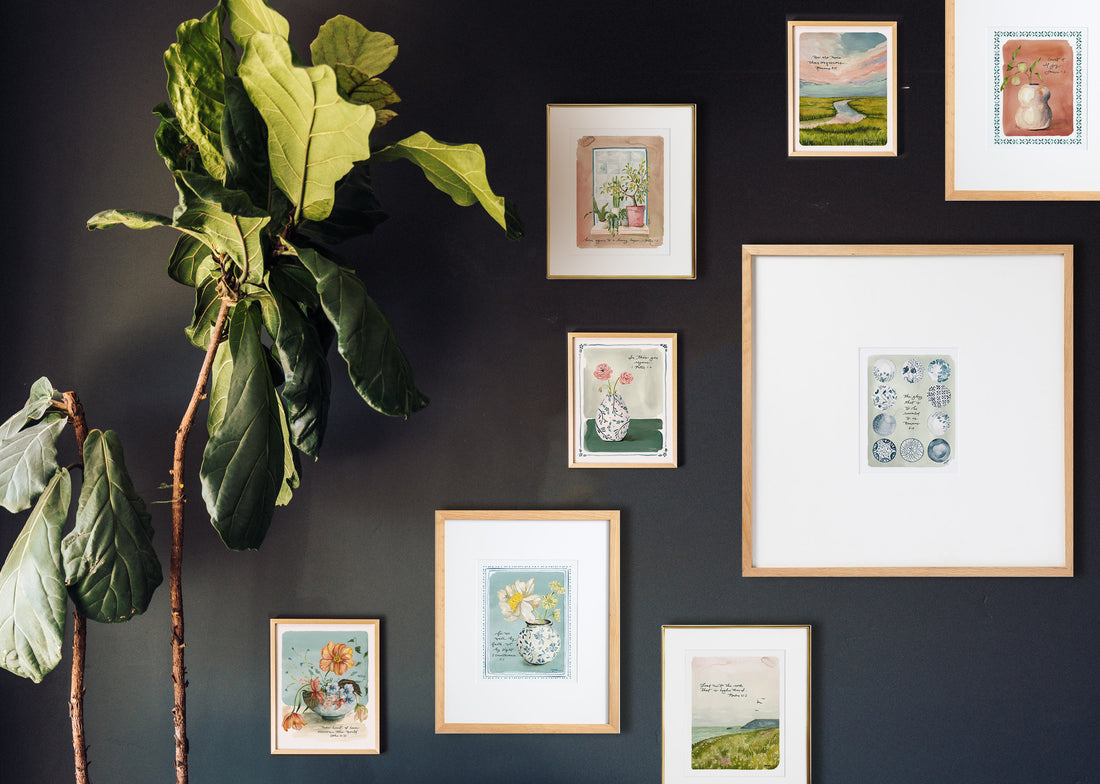
4. Create “moments.”
Instead of placing a piece of art all by itself on a wall, think about grouping it together with other pieces of art, furniture, lighting, and decor. This will give your space a more cozy, thoughtful, and intimate feel. If you’re hanging a cluster of pieces together, think of the middle of the grouping as the center of the overall piece.
5. Prep your spot.
Cut a piece of craft paper to match the dimensions of your art, and tape it onto the wall to find just the right height and arrangement. This is especially helpful when hanging several frames near each other or creating a gallery wall. When you think it’s in the right spot, take a step back and confirm that it looks good before making any nail holes.
6. Hang your piece.
Choose your hanging hardware based on the weight of your frame. Once it’s installed, you can use a small level on top of the frame to ensure it’s straight when you hang it.
All that’s left is to take a step back and admire your handiwork. Happy framing, friends!